Creating Microsoft Access Queries

Leave a Comment
Creating Microsoft Access Queries
A query can be based on tables or on other queries. To create a query, you open the tables or queries on which you are going to base your query in Query Design view, and then use the options in Design view to create your query. You then click the Run button to display the results. You can save queries for later use.
To open tables or queries in Query Design view:

1.   Activate the Create tab.
2.   Click the Query Design button in the Other group. The Show Table dialog box appears.
3.   Activate the Tables tab if you want to base your query on tables, activate the Queries tab if you
want base your query on queries or activate the Both tab if you want to base your query on both tables and queries.
4.   Click to choose the table or query on which you want to base your query.
5.   Click Add. The table appears in the window.
a.    Click to choose the next table or query on which you want to base your query.
b.   Continue clicking tables or queries until you have all the tables and queries you plan to use.
6.   Click Close. Access changes to Query Design view.

Display All Records and All Fields

In Query Design view, each table has an option that allows you to display all of the fields and all of the records in a table. This option appears on the field line on the drop-down menu as the table name followed by a period and an asterisk (tablename.*).


To display all records and all fields:

1.   Open a table or query in Query Design view.
2.   Click the down-arrow in the first field on the Field row and then select the tablename.* option.
The table name appears on the table line.
3.   Click the Run button. Access retrieves all of the fields and records for the table and displays
them in Datasheet view.


Read More

Hide Columns

1 comment
Hide Columns

There may be times when you may not want to display a certain column or set of columns. In such cases, you can temporarily hide the column or columns from view. Later, if you want to display them column again, you can unhide them.

To hide columns:

To create relationships:


1.   Close all tables and forms. (Right-click on the tab of any Object. A menu appears. Click Close All.)

2.   Activate the Database Tools tab.
3.   Click the Relationships button in the Show/Hide group. The Relationships window appears.
 
4.   If anything appears in the relationships window, click the Clear Layout button in the Tools group.
If you are prompted, click Yes.
5.   Click the Show Table button in the Relationships group. The Show Table dialog box appears
6.   Activate the Tables tab if your relationships will be based on tables, activate the Queries tab if your relationships will be based on queries, or activate the Both tab if your relationships will be based on both.
7.   Double-click each table or query you want to use to build a relationship. The tables appear in the Relationships window.
8.   Click the Close button to close the Show Table dialog box.

9.   Drag the Primary table’s primary key over the related table’s foreign key. After you drag the primary key to the related table’s box, the cursor changes to an arrow. Make sure the arrow points to the foreign key. The Edit Relationships Dialog box appears.
10. Click the Enforce Referential Integrity checkbox.
11. Click Create. Access creates a one-to-many relationship between the tables.

12. Click the Save button on the Quick Access toolbar to save the relationship.
Read More

Filter a Table

Leave a Comment
Filter a Table
You can apply a filter to see only the records you want to see. For example, perhaps your database contains students from the states of DE, NJ, and PA and you only want to see the students from DE. You can filter your data so only DE students display.
Each time you apply a filter to a column, it replaces any previous filter you applied to that column. For example, if you apply a filter so you only see students in DE, and later you apply a filter so you only see students in NJ, Access clears the DE filter and then applies the NJ filter.
You can apply filters to multiple columns in the same table. For example, by applying a filter first to the State field and then to the Last Name field, you can see all of the students in the state of DE whose last names are Adams.

To apply a filter:
1.   Click the column label for the column you want to filter.
2.   Activate the Home tab.
3.   Click the Filter button. A menu appears.
4.   Uncheck the items you do not want to appear, making sure only the items you want are checked.
5.   Click OK. Access filters your data and displays the word Filtered at the bottom of the window.
To remove a filter:


1.   Activate the Home tab.
2.   Click Advanced in the Sort & Filter group. A menu appears.
3.   Click Clear All Filters. Access clears all the filters you have applied.
Read More

Sorting, Filtering, and Creating Relationships

Leave a Comment
Sorting, Filtering,and Creating Relationships
You can sort Access data so you can view records in the order you want to view them, and you can filter data so you only see the records you want to see. This lesson teaches you how to sort and filter an Access table.
Access data is stored in multiple tables. Relationships join tables together so you can work with the data from multiple tables. This lesson also teaches you how to create relationships.
Sort a Table
The Insert option inserts a column before the selected column.

To insert a column:
By sorting, you can put a column of information in alphabetical, numerical, or date order. You can sort in ascending order (alphabetical from A to Z, lowest number to highest number, earliest date to latest date) or descending order (alphabetical from Z to A, highest number to lowest number, latest date to earliest date). You can also sort within a sort. For example, you can sort by state and then sort within each state by city. When sorting within a sort, perform the innermost sort first. For example, if you are sorting by state and then city, sort the city first and then sort by state.

To add a sort:
1.   Click the column label for the column you want to sort.

2.   Activate the Home tab.
3.   Click the Ascending  or Descending button in the Sort & Filter group. Access sorts the column in ascending or descending order.

To remove a sort:


1.   Activate the Home tab.
2.   Click the Clear All Sorts button in the Sort & Filter group. Access clears all of the sorts you have applied.
Read More

Modify a Table

Leave a Comment
Modify a Table

After you create a table, you may need to modify it. You can delete columns, insert columns, or move columns.

Delete Columns

The Delete option permanently deletes columns and all the data contained in them. You cannot undo a column delete.
To delete columns:
1.   Click and drag to select the columns you want to delete.

2.   Activate the Datasheet tab.
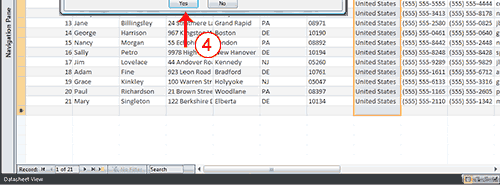
3.   Click Delete in the Fields & Columns group. A prompt appears.
4.   Click Yes. Access deletes the columns you selected.

Insert Columns

The Insert option inserts a column before the selected column.

To insert a column:
Read More

Working with Microsoft Access Tables

Leave a Comment
Working with Microsoft Access Tables
After you create an Access table, you can modify it, enter data into it manually or import data from somewhere else, such as Excel. This lesson teaches you how to modify a table and enter data.

Enter Records

After you have created a table, you can enter data into it.

To enter data into an AutoNumber field:


·               Press the Tab key. When you make an entry into another field in the record, Access will automatically make an entry into the AutoNumber field.
To enter data into fields that have a lookup list:

1.   Click the down-arrow that appears when you click in the field.
2.   Click to select the entry you want.
3.   Press the Tab key.

To enter data into a Yes/No field:

·     Click the checkbox for Yes; leave the checkbox unchecked for No.
Read More